Or, more accurately, my adventures in creating Kevin.

I saw a YT video with a cute little robot that had a camera on it, and I thought I might want to make one. It was 3D printed, which I could have done, but prints take a long time, and a chassis with two 12v motors was cheap, so I decided to go that route. Kevin needed a camera, obviously, so I got an ESP32 WROVER dev board that had a good number of spare pins, and a backup ESP32 Cam board, which I’ll use if I must, since it doesn’t have enough pins for the two servos and the ultrasonic sensor, or anything else I might want to put on.


The camera part was pretty easy to get into ESPHome, but the picture was awful, even for a 2MP camera on a board that cost so little. I looked more closely at it, aaaand…it was glued crooked. In the factory, they set the lens focus to “infinity” (…and BEYOND?), and then glue it in place. I tried cutting through the glue with a small utility knife in hopes of unscrewing the lens and re-positioning it, but it was taking too long, so I said to hell with it and “liberated” the camera off the other board. I’ll mess with it later, maybe, or order another one from Ali for three bucks. Don’t care right now. So, the camera works, I can use it in HA, and the board doesn’t get too hot…we’re good.

The “winter storm” (eyes rolling) delayed the chassis I’d ordered from Amazon. It was supposed to have arrived on Friday, but by Saturday, it was still in the sorting center Kansas City MO, so I knew that wasn’t going to happen. No big deal; it’s not like I have nothing else to do. Finally, it showed out for delivery on Tuesday. I waited, and at 1850h, poor old Angie finally made it. She’s two years from retirement, and had been working for 12h. Someone needs to kick DeJoy repeatedly in the nuts, but that’s beside the point. For the record, I’d volunteer. It was by then too late to start assembly, so I just looked in the box. Seemed pretty straightforward; I wasn’t sure what the bunch of tiny screws were for, and I’m still not (the instructions say they’re for the track, but the track has no screw holes??), but it ain’t rocket science, so I decided to figure it out in the morning.

The instructions are a single page, printed in black and white. It’s a good thing this wasn’t complicated because colour pictures printed in black and white lose a lot of detail. They also had instructions online; clearly what they’d printed for the box insert. I read both, and while the words themselves were English, the instructions were not English. “Remove the track first and remove the excess parts.” What? Remove the track from what? It’s not attached to anything–how can I remove it?! “Adjust the suitable length and install the track. (Pls use the tool to cut off the spare tracks if it is too long).” Not joking…the instructions say, “Pls”. Okay, use what tool to cut off what part of the tracks? The genuine chineseium multi-bit screwdriver thing? Maybe? I look closer, and they’re just pins. Okay, so we’re not cutting; just removing links. One of the screwdriver bits fits the pin hole. I can do that.

I needed a plastic plate to keep the pin ends on the back sides of the boards off the metal chassis, and also so I’d have somewhere to mount the boards, so I made a quick rectangle with low sides. Rather than piss around, getting exact measurements for each hole in the chassis base, some of which I won’t even use, I’ll just mark them and drill through the print. Cheating, yes. Care? No. I’m thinking, “That’ll take a while to print, so I’ll work on the motors.” Famous last words. I have no female spade terminals that are small enough for the motors, which had never occurred to me, so I have to solder them directly. That’s not how it’s supposed to work, but as long as I get current, I don’t give a damn how it gets there. I did some fairly questionable soldering to get the wires on, and covered the connections with shrink tube. The motor driver is mostly straightforward; two terminals for positive and negative of each motor, one connection for 12v, one for 5v, and one for common ground, then four pins that connect to the board for control. I’m not sure what the 5v in is for; I think it may power the chip for control, and the 12v powers the motors directly. IDK whether the board I’m using can supply 5v, but I guess if it can’t, I can use a step-up regulator; I’m pretty sure I have some somewhere. Then again, a nap sounds rather appealing right now, and my print has another hour and a half left to go. Romans used to nap a lot, I think, and that’s why Rome wasn’t built in a day. Kevin won’t be, either.


How stupid can a single person be? I’ll tell you how stupid…

I got up at 5:30, and while I don’t have angle to mount it, I at least wanted to flash Tasmota to the Sonoff SV that I intend to use to make an electromagnetic lock for the garage. Okey-doke…need to solder on pins. No problem!

Wrong. I’ve soldered a lot of pins since I learned how from the nice Indian lady on YouTube, and I had pins on the SV pretty quickly. Went to plug it into the serial converter, and…the pins are too short. WTF? Did I get them too hot and melt the plastic so they slipped? No, they’re all nice and even. What the hell did I do? I soldered them on backwards! No, not just facing the wrong way; instead of putting the short side through the board, I put the long side through. How I managed to do that, I don’t know, but I have a heated solder-sucker, so I figure I’ll just de-solder and do them right.

Wrong. I went into the Man Cave, and looked in the plastic bin with the white lid. Extra tips, extra solder, extra flux, some cases, and a couple of soldering irons…and no solder-sucker. Okay, maybe I just forgot to put it away, and it’s by my desk. Nope. Not there. Okay, I was soldering at the table, so maybe I used it there? Didn’t think so, but worth a check. Nope. Jesus H Christ on a crutch…where is the goddamned thing! Well, never mind for now; I have two of the SVs, so I’ll just use the second one. Got the pins soldered on it, connected it, fired up Tasmotizer, and we’re all set! Right? Right?
Wrong. Connection timed out. I had problems with Arduino the last time I tried to flash, so it wasn’t too much of a surprise, but I spent the next three hours, trying to troubleshoot this connection. The serial converter is correctly detected, and so is the port. I am in the dialout group, and I’ve held the power button while connecting the SV, so it’s in flash mode. In the end, I removed brltty (it’s a TTY thing for Braille, and I’d read that sometimes it will take over the USB port, so it needed to die), and I ran check after check, doing things I only half understood, trying to figure out why it showed as connected, but clearly was not. I even rebooted a few times, though that’s more of a Win thing than a Linux thing. Nothin’. Fuck.

Eventually, I decided maybe it was Tasmotizer itself? Probably not, but there’s a web interface, so it was worth a shot. Everything appeared right in the browser, so I hit the button to flash. The device isn’t ready. What? Whaddya mean it isn’t ready? I’ve been at this for four fucking hours; it damned well should be ready! I thought maybe it was because Tasmotizer still had hold of it somehow, or at least the port, so I disconnected it, held the button, and reconnected. The flashing green light didn’t come on this time? Huh? Tried again. Still no flashing green light. What’s going on? Did I fry it somehow?

I gave up on it and went looking for my solder-sucker again so I could use the first SV after putting on new pins. WHERE THE HELL COULD I HAVE PUT THE SOLDER-SUCKER??? Back and forth I went, Man Cave to table, to office, back to Man Cave…it’s nowhere to be found. Then, I happened to be walking up the hallway, and looked at the chair beside the table. Miffy’s toybox is there so Beatrice doesn’t push it around when she vacuums, and underneath it is…the other plastic bin with the white lid. You know…the one where I store my soldering station, my flux, and the stuff I regularly use, including the solder-sucker. Jesus…fucking…Christ. I forgot I had two of them. There’s the solder-sucker, big as life, right where it’s supposed to be. For fuck’s sake.
While I was waiting for the solder-sucker to heat, just for the hell of it, even though the green light wasn’t flashing, I tried Tasmota one more time, and…it flashed right away. I hadn’t fried it or damaged it at all. What I had done was forget how to flash a Sonoff device, or more specifically, what the lights mean. The flashing green light does not, in fact, mean, “Hey, gimme some code over here!”; it means, “Can a guy get some wifi?” When the LED is off, and not flashing, the device is in flash mode. Le…sigh.

Since the solder-sucker was hot anyway, I de-soldered the pins I’d fucked up and put on new ones. IDK what I’m going to do with the second SV, so I guess I’ll just stick Tasmota on it and store it until I find a use. At least this time I’ll remember what the goddamned lights mean.

How stupid can one person be? Oh yeah…that stupid.

Why is every speaker or sound system in existence now fucking Bluetooth?!? I don’t want to play music from my goddamned phone, I don’t want to play music with lagging groups…I just want a good wired speaker setup. That’s all.

If you refer to your pets as your “fur babies”, fuck off; you’re a loser, and you’re stupid, and I hate you.

Not much of a project, and in this case, I really kind of “over-sanded”, but considering it will be entirely covered by his “dinner mat” (lol), it’s good enough, and certainly better than the corrugated insert from a scratching pad, covered with black Gorilla tape!

I initially used three 2x6s, then cut it down to size. This is rough lumber, so I sanded with 60, 80, 120, and 220.

I wiped it down with “odorless” (hah!) mineral spirits, and applied a coat of stain. I kind of wish I’d skipped the 22o because it didn’t take as much stain as I wanted.

Really slopped the second coat on!

Wiped off, and applied leftover Bona Mega. Christ knows that stuff cost enough, and I’m not planning any floor projects for the near future…or possibly for the rest of my life!

I ended up with three coats of poly, so now I just have to leave it for a week to cure, since the dinner mat is plastic, and completely covers the cat table. Not perfect by a long shot, but a nicer way to keep Eugenia the robot vacuum from running up on Miffy’s food, and it cost about five bucks!

I loved my husband, but I did not love the green plastic round table that he bought years and years ago. I’d hoped he would throw it away when we moved from the old house, but…nope! I might have hated it less if it hadn’t been round, but I just don’t like round tables; they take up too much space for the surface area that they provide. Anyway, I had to order some 2x4s last week for work, and since RP would be delivering them to the shop, I asked MN if I could add some 2x10s and 2×6 to the order and sell them to myself. He said sure, and ME even delivered everything to my house on Friday. The 2x10s were for the table and so I can get rid of the bale of straw (that’s another story!) on the patio, and the 2×6 were for a better “table” for Miff’s dinner mat (LOL…dinner mat), and also so I’ve got some random pieces of lumber for little projects.

It’s just ordinary 2×10 yellow pine, so it’s certainly not fancy, but I’m not fancy, either, and it’ll be good enough to put outside on the patio.  While the lumber was stacked on the patio, the white pine 2×6 gained a small, angry resident. I do not think he wants a hug…I think I should be glad he’s little and I’m big. 🙂

2x10s cut, glued and clamped.

I definitely could have done more sanding, but I didn’t care that much; I’ll never make a silk purse out of a sow’s ear, so it’s good enough. There was a piece of 1×3 poplar that came with the house, and I’d never found a use for it thus far, so I used it to brace underneath. Sanded and ready to stain.

Not quite…this is pine, so I gave it a “wash” with mineral spirits before staining it to help keep it from going blotchy. You can really see it’s yellow pine!

Wiped on a first coat of stain because I wanted to see if it was going to be blotchy. Not bad for a first coat.

The second coat I applied with a sponge brush, and really whacked it on to let it absorb everything it would.

Waited 15 minutes, then wiped off the excess. It’s a lot more neutral, which was kind of where I wanted to go. I’m okay with this. It’s not magnificent, but I used points for the legs and already had everything else, so the cost of this table, even after the poly is done, will be $13.08 plus tax, and I get a solid wood table with adjustable metal legs. I think I’m going to use the ridiculously expensive Bona poly that I have left over from the floor. Maybe. I might use the Polycrylic that I have left from…whatever the hell I used it for. Don’t know yet.

I brought it inside to do the poly. Partially because it’s raining and chilly, but also because while there is cat hair indoors, there is not “stuff” falling off the trees. My glue blob is readily apparent here, but it was too much sanding, so I said to hell with it. Adds character. 😀

My trusty assistant had to check out the crinkly plastic. Miff loves lightweight plastic drop sheets; when I did the floor, I left a pile of them in the bedroom for nearly a month because he’d pounce on the pile, play for a few minutes, then fall asleep in it.

There. Two coats of Minwax Provincial stain, and four coats of Bona Mega satin poly, finished after work on 05-15-20. The legs won’t be here until next Wednesday, so the poly has a week to cure to full hardness. Beautiful, no, and Bob Vila won’t be knocking on my door with an award any time soon, but perfectly serviceable, and (assuming the legs aren’t total junk) nice and sturdy. Weighs a fucking ton; this isn’t going to blow away!

Last Sunday, I cleaned up the patio a bit and washed the windows, which is why the concrete is wet. I was sort of tired of having the table top inside, sitting on sawhorses, so I took it out and put it roughly in place. The legs will arrive on Wednesday, which will be one week from the last coat of poly, allowing it to cure completely. I’ll just flip it over on the sawhorses, attach the legs, and put it in place. I like the size; big enough to be useful, but not stuck out so far as the round one, and doesn’t look so trashy because it’s not plastic. My plan is to paint Bulky’s chair black to match the legs of my little table and this one, and to stain my rocker the same Provincial as the table. P’s Adirondack chair is probably going to end up painted the same colour as the trim on the house. Assuming I ever get Onje’s table done, that will be stained the same as the big table. It’s not a $2000 patio set, but it’s good enough for us.

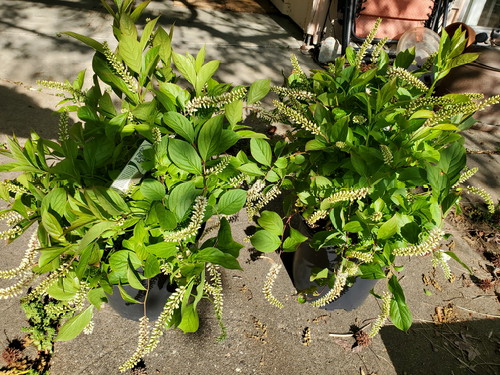
So…I’d ordered some bird seed online from Buchheit yesterday, and after work, I went to pick it up. It started raining right at four, so I wasn’t happy about that, but the birds would kick my arse if I let them go without sunflower, mixed seed, and their peanut suet (plus, I needed a narrow shovel because I plan to move some of the cup plants that have popped up absolutely everywhere). As I drove over to the pickup parking spots, I caught a glimpse of what appeared to be Virginia Sweetspire. I didn’t stop because it was raining, and I didn’t have time, but I was pretty sure it was sweetspire. I have a small sweetspire that hitched a ride in a weigela I bought a few years ago (which is busy dying over on the south side, so of course it’s one of the beautiful red ones), but it needed friends even if friends were kind of expensive.

I wasn’t going to buy any plants, but I had a terrible accident! I’ll save typing it all over again; this is what I sent to R and J….

Terrible accident today. I was walking across the patio when suddenly, Ravon’s door opened. Startled, I fell onto the seat, and the keys that happened to be in my hand went into the ignition, and started the car! I wanted to be sure it wasn’t malfunctioning, so I took it for a short drive…to Buchheit. I needed a breath of fresh air, so I got out and walked over to the plants. I had a cart because I was feeling a bit weak, and wouldn’t you know it, I tripped and the cart hit the shelf, knocking two of the Virginia Sweetspire that I’d seen yesterday right in! I had to go inside to tell the manager that their display was dangerous, but as I walked past the registers, the scanner somehow picked up the bar codes and rang up the two plants. Amazing–I know! At that point, it would’ve been quite rude to walk out and put them back, so I just paid for them. Tragic accident. Happy butterflies and bees, though…they love sweetspire!

It’s spring on the Parview flower farm, so of course I’m behind on my posting, since I’ve been working so hard in the fields (read: parking my fat arse in my rocker on the patio).

I’m posting three pictures of the yellow honeysuckle out front because it’s just fucking pretty and it’s my blog, so I’ll do what I want. 😀

Just as pretty, especially in morning sunlight, Canadian Columbine. Looks like a good puff of wind would flatten it to the ground, but it’s tough as all hell.

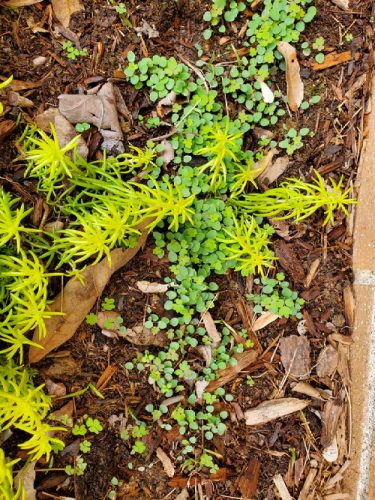
These don’t look like much yet, but the columbine seeds I tossed out in front of the house in…February (I think) apparently did get enough cold to trigger them to germinate. They don’t look like much right now, and it didn’t help that a cat messed up the neat line I’d made when it decided that was a litter box (I’m looking at you, Fat Ass Owl Eyes), but someday, they’ll be beautiful in the morning sun as well.

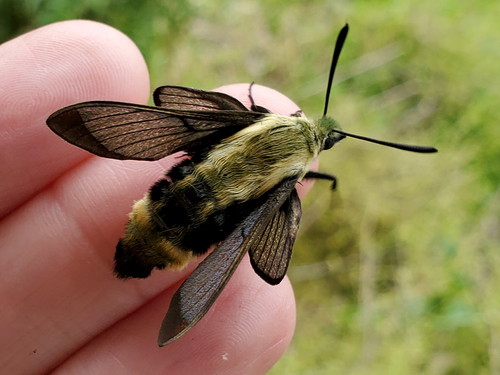
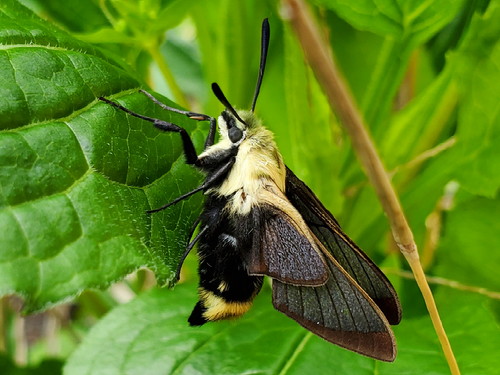
Since I posted honeysuckle, I’ll post the little Hemaris diffinis whose larva fed on honeysuckle. I found him while I was clearing crap out of the south flowerbed, and it’s his birthday, so his wings are still soft and not clear yet. That’s the only reason he let me hold him!

I put him on a coneflower leaf where he’d be safe until he’s ready to fly. I love their little stripe-y faces!

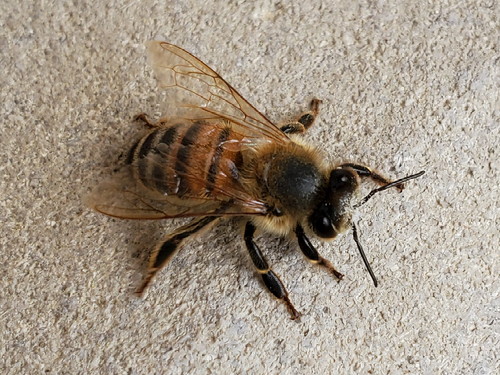
Cute little bee-guy on the ledge around the house. He was helping me clear the flowerbed.

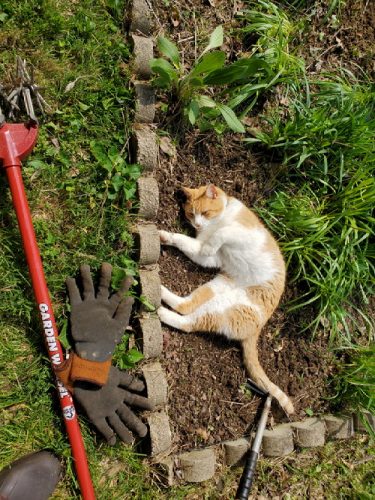
Onje, however, was no help at all. This differed from usual in no way whatsoever.

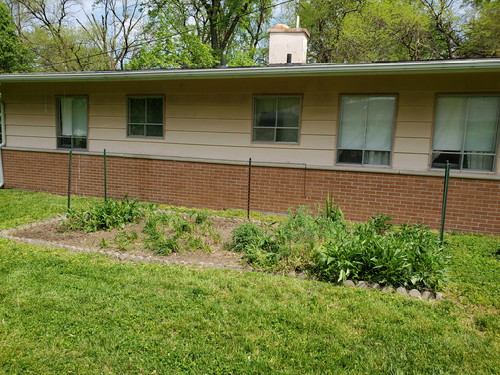
I eventually did finish clearing out enough of the weeds that stuff will grow, and seeding some annuals in the south bed. The coneflowers on the west side look like they’re big enough to bloom this year, and I didn’t see many Rudbeckia seedlings, which is the reason nothing else could grow on that side in previous years. We’ll see how it goes, but at least it’s not full of dead stems and weeds.

The first of P’s “intense blue flowers”. He never could seem to remember they were bachelors buttons. I didn’t shear them; I hope I won’t regret that, but they were just about to bloom, and they’re so pretty.

The old lady’s clematis. I remember that little string of leaves I found over on the north side of the patio. It’s no little string now, and it loves that southwest corner!

Just butterweed. I leave it because it’s native, blooms early when bees need the help, and I’m lazy.

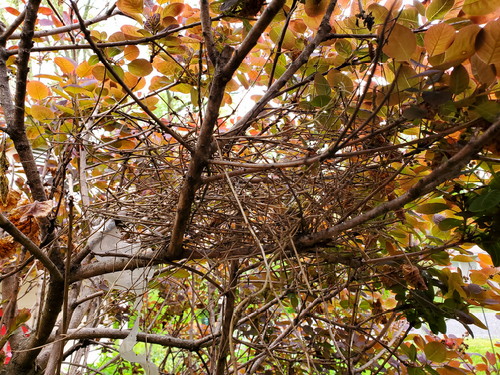
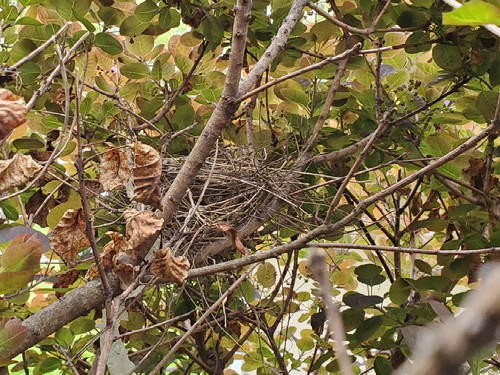
These will get their own page (assuming the C family has eggs this year), but…

Nest beginnings.

Making progress!

Well, my part is done, assuming that Stinky and Mini Stinky don’t think it’s a good spot to dig for worms, and that the neighbourhood cats don’t bypass my efforts to deter them from using it as a litter box. Now, it’s up to the sun, the rain, the soil, and the seeds.

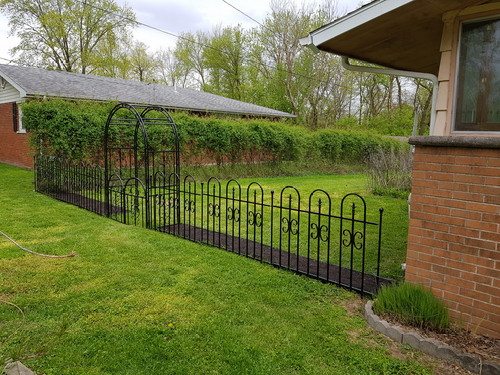
Doesn’t look too bad, if I say so myself, and (elements willing) will look even better once the plants grow…assuming they do! Cardinal climber on either side of the arch, and behind the fence, zinnia (Carousel and Cut and Come Again), scarlet pumpernickel, tropical milkweed, clasping coneflower, and gaillardia.

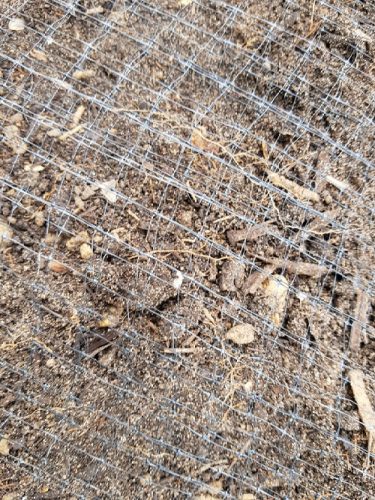
I laid Bird Block over the beds to help deter cats. We’ll see how that goes.

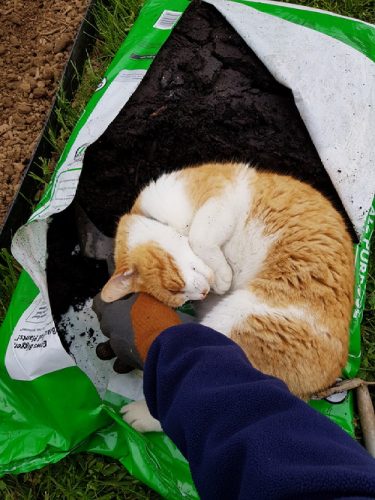
My assistant was as much help as usual. I’m trying to scoop, he’s actually inside the bag, rolling around.

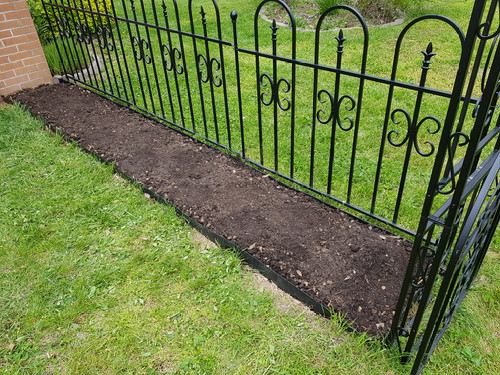
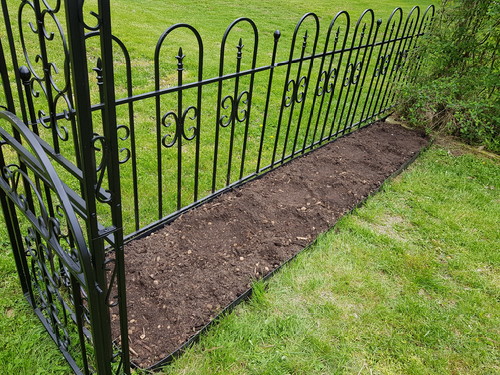
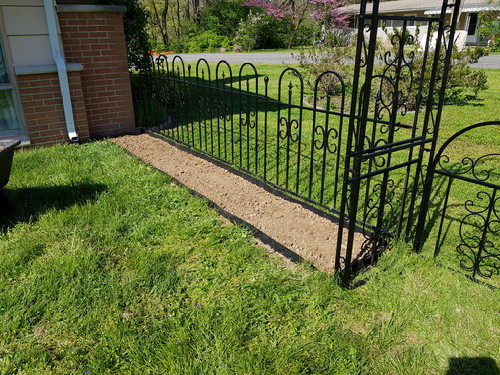
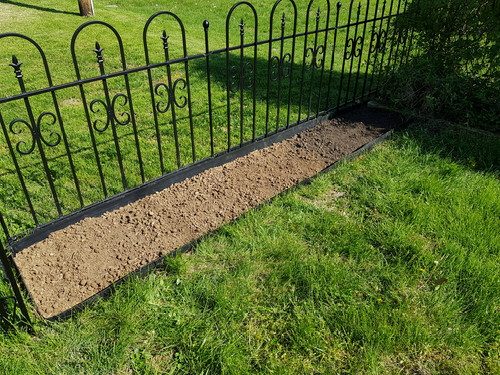
Not finished because I had to mow the stupid lawn, but I got the edging installed (I’ll give it three stars) and hauled over the six bags of topsoil that I just bought, plus a bag I found that has been over by the garage for probably two years. My upper back and shoulders know I did it, too, because the bags are 40lb damp weight, and they were all wet! Didn’t take long for the sun to dry out the top layer, though.


I also leveled the arch a bit better; it’s closer to the ground than I really like, but I’m going to be growing cardinal climber on it, which (I’d expect) will utterly engulf it, and make for a lot more wind resistance, and I do NOT want this thing to blow over because it’d be an epic fucking nightmare to put back up once plants are growing on it.

Today, assuming it doesn’t rain, I hope to get the bags of garden soil and Black Kow over there, and at least get them mixed in, if not get the seeds planted. I just ordered the cheap wire fencing for the inside so my zinnias won’t fall over and make it an even bigger PITA to mow. It’s already a PITA, but it looks so nice that it’s worth it, and makes it much easier to transition between the height I mow the front yard to look nice, and the fact that I half-ass the back yard on the highest setting the mower will go. 😀 Anyway, we’ll see how much my back and shoulders are willing to do if the weather co-operates!